
Free UK Shipping
On Orders £30+. Next Day on Orders £80+
Same Day Dispatch
Weekday Orders Placed Before 3pm
Free Returns
100% Satisfaction Guaranteed
Lifetime Support
With Extended Warranties
Free UK Shipping
On Orders £30+. Next Day on Orders £80+
Same Day Dispatch
Weekday Orders Placed Before 3pm
Lifetime Support
With Extended Warranties
Pisco Precision Needle Valve Setup Instructions
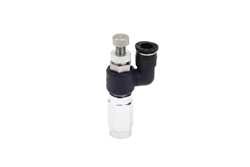
Your Pisco Precision Needle Valve will come pre-attached to the extension (if purchased).
The valve shown in this guide is the 'straight' variety, but the same instructions apply to the 'elbow' variety.
The valve shown in this guide is the 'straight' variety, but the same instructions apply to the 'elbow' variety.
1. Attach the small O-ring that comes with your Pisco valve to the regulator needle valve.
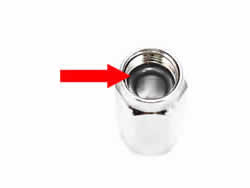
2. Ensure the large O-ring is positioned in the well of the extension.
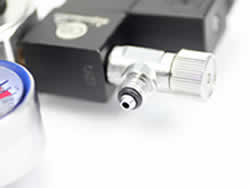
3. Screw extension (with Pisco valve attached) onto regulators needle valve. To ensure an air-tight seal it is recommended to use a spanner/wrench to fully tighten.
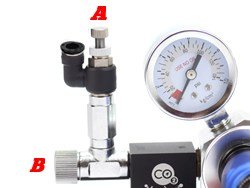
4. Close the output of the Pisco needle valve (A) by turning the adjuster knob fully clockwise. Fully open the old needle (B) by turning anticlockwise.
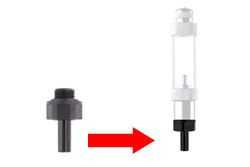
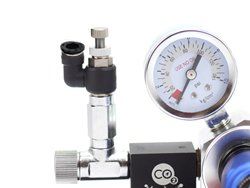
5. Attach your bubble counter using the 'Pisco Flow Controller to Bubble Counter Adapter' by screwing the adapter into the bubble counter.
6. Push the adapter into the Pisco valve until it is not possible to insert any further.
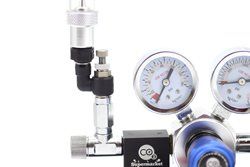
Installation is now complete!
You can turn your solenoid on and adjust the flow rate using your precision Pisco needle valve.
Installation is now complete!
You can turn your solenoid on and adjust the flow rate using your precision Pisco needle valve.

Someone added a product to their cart
View ProductSomeone added a product to their cart
View Product